Reverse Engineering the Build with Chrome "API"
Build with Chrome is a product from Google that allows people to claim a plot of land in the world map and build Lego on it. While it's interesting to build Lego from scratch, I also wanted the ability to import images or 3D models directly. (I checked with their terms and conditions, and I didn't find anything against this.)
Google doesn't have the API publicly available, but with a little digging around I was able to figure out how the protocol works. In order to import a 3D model, I must figure out a few things - where does the data get stored? In what format does it get stored? And last but not least, how do I generate my own data using the same format?
Web Service
When you claim a plot of land, the URL on the browser becomes something like this:
https://buildwithchrome.appspot.com/builder#pos=303407x375602&load=ahFzfmJ1aWxkd2l0aGNocm9tZXIsCxIFQnVpbGQiIXRpbGV4XzMwMzQwN190aWxleV8zNzU2MDJfem9vbV8yMAw
The interesting bit is in bold. Even though Google says there's no way to save your Lego build and go back to it another time, there actually is. Every so often, your current work is saved to the server to a URL like this:
https://buildwithchrome.appspot.com/api/builds/ahFzfmJ1aWxkd2l0aGNocm9tZXIsCxIFQnVpbGQiIXRpbGV4XzMwMzQwN190aWxleV8zNzU2MDJfem9vbV8yMAw
The web api accepts json, and a simple sample looks something like this:
| Field | Data |
| buildData | iVBORw0KGgoAAAANSUhEUgAAAAIAAAACCAYAAABytg0kAAAAFUlEQV QIW2NkgAJGexbh/0f+/GMAAA+uBBZVeE76AAAAAElFTkSuQmCC |
| structure | {} |
The structure field is always empty, we can safely ignore it. The buildData is curious, what format is this? I swear I've seen iVBOR somewhere before... It doesn't matter what I build, it always starts with iVBOR...
Block Data Format
I don't know what Google calls their data format for storing the Lego block configuration. For consistency in this article, I'm going to refer it as Block Data Format (BDF)
After staring at the build data sent to the Google server for a while, I figured out what iVBOR was - it's the first couple bytes of a PNG file in base64 format. Knowing that, I "simply" have to decode the PNG and figure out its data layout.
After some experimentations, here is how the PNG is used to record the block configuration of your current build. It's quite brilliant really, as the PNG is not used to represent an image in the traditional sense- the "RGB" value of each pixel is repurposed to store some information about the current block configuration. In essence, PNG is used just as a data compression container.
The PNG is in RGBA format, and each pixel has 4 bytes. In BDF, two pixels form a single unit to record the location of a single Lego block - in other words, each Lego block uses 4 x 2 = 8 bytes in the decoded PNG.
| Bit position | Meaning |
| 0 | No meaning. Constant 63 for PNG. |
| 1 |
Brick Color (index) 0: white 1: gray 2: black 3: orange 4: red 5: blue 6: green 7: dark green 8: yellow 9: brown |
| 2 |
Block Type (index)
Typically just 0 for the 1x1x1 piece |
| 3 | No meaning. Constant 255 for PNG. |
| 4 | x position (0-31) |
| 5 | y position (0-90. Typically multiple of 3) |
| 6 | z position (0-31) |
| 7 | No meaning. Constant 255 for PNG. |
For example, let's say you have a single brick in the center of your build:
The build configuration would be represented by the following PNG encoded in base64 format:
iVBORw0KGgoAAAANSUhEUgAAAAIAAAACCAYAAABytg0kAAAAFUlEQVQIW2NkgAJGexaG/5f+CDAAAA2YAyOsoq7jAAAAAElFTkSuQmCCUsing Python, we can decode the PNG and get the stored pixel values:
import Image
import cStringIO
imgStr = "iVBORw0KGgoAAAANSUhEUgAAAAIAAAACCAYAAABytg0kAAAAFUlEQVQIW2NkgAJGexaG/5f+CDAAAA2YAyOsoq7jAAAAAElFTkSuQmCC"
tmpImg = cStringIO.StringIO(imgStr.decode('base64'))
im = Image.open(tmpImg)
list(im.getdata())
Running the above code would show us the pixel values stored are
[(0, 0, 0, 0), (0, 0, 0, 0), (63, 4, 0, 255), (17, 0, 16, 255)]The first two pixels do not conform to the BDF, so we ignore them. The next two pixels represent the brick we placed on the board.
| Bit position | Meaning |
| 0 | No meaning. Ignore. |
| 1 | The brick is red |
| 2 | A 1x1x1 brick piece |
| 3 | No meaning. Ignore. |
| 4 | x: 17 |
| 5 | y: 0 |
| 6 | z: 16 |
| 7 | No meaning. Ignore. |
Putting things together - Importing a 2D image
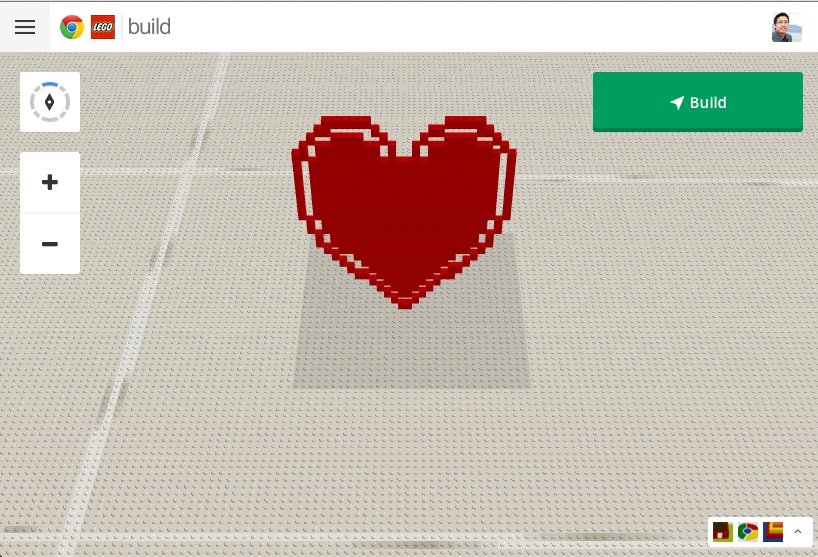
Now that we know how the brick configuration is stored, we can now import models and generate the brick configurations we want. Importing 2D images and placing them like a billboard in 3D like the heart at the top of this article is relatively simple. The following python code would read a 2D image file, translate it into the BDF and generate a PNG encoded in base64 with that data:
import cStringIO
import Image
import StringIO
import base64
import pdb
import urllib
import sys
import math

def main(srcImagePath):
  srcImg = Image.open(srcImagePath)
  width, height = srcImg.size
  pixelLocations = []
  for i in range(height):
    for j in range(width):
      pixel = srcImg.getpixel((j,i,))
      r,g,b,a = pixel
      if ((r<250) or (g<250) or (b<250)) and a > 254:
        colorIndex = 4
        pixelLocations.append({'xy': (j,i,), 'color': colorIndex})
        sys.stdout.write('X')
      else:
        #pass
        sys.stdout.write(' ')
    print ""
  numberOfPixels = len(pixelLocations)
  outputImageWidth = int(math.floor(math.sqrt(2*numberOfPixels) + 1))
  outputImageWidth = outputImageWidth + outputImageWidth % 2
  outputImg = Image.new("RGBA", (outputImageWidth,outputImageWidth))
  outputImgData = []
  for pixel in pixelLocations:
    pX, pZ = pixel['xy']
    color = pixel['color']
    brick = (63, color, 0, 255,)
    location = (pX, (height-pZ-1)*3, 16, 255,)
    outputImgData.append(brick)
    outputImgData.append(location)
    print "{0}{1}".format(brick,location)
  outputImg.putdata(outputImgData)
  outputStream = StringIO.StringIO()
  outputImg.save(outputStream, format="png")
  outputString = outputStream.getvalue()
  outputBase64 = base64.b64encode(outputString)
  print outputBase64
  return 'buildData='+urllib.quote(outputBase64,'')+'&structure=%7B%7D'
For simplicity of demonstration here, the brick color is chosen to be constant red regardless of the original 2D image. In my actual script, I wrote a method to find the best matching color out of the available 10 for each pixel.
Putting things together - Importing a 3D image
Importing a 3D model is slightly more complicated. Typically 3D models are stored in vertices, textures and triangles, but for the purpose of building Legos we need to have the model in voxelized format.
Thankfully due to the popularity of minecraft, many tools are available for this purpose - almost too many to chose from actually. The best one I found is called MagicaVoxel. It can load up many of the 3D models I can find, and you can even edit them before exporting them into a voxelized format. The setup is also incredibly straightforward.
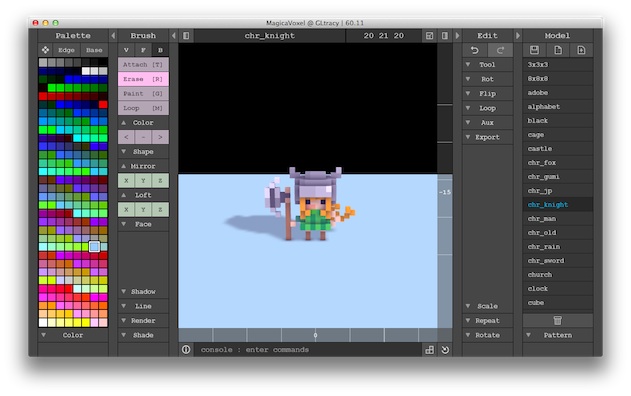
MagicaVoxel can export the voxelized models in many different formats. Since I have to translate that into the Build with Chrome's Block Data Format, I chose a format that can be manipulated easily using a python script - the raw format.
The following python script reads the voxelized model and outputs it back in BDF (as a PNG):
import sys
import pdb
import cStringIO
import Image
import StringIO
import base64
import pdb
import urllib
import sys
import math

def main(srcRawPath):
  pixelLocations = readRaw(srcRawPath)
  return encode(pixelLocations)

def encode(pixelLocations):
  numberOfPixels = len(pixelLocations)
  outputImageWidth = int(math.floor(math.sqrt(2*numberOfPixels) + 1))
  outputImageWidth = outputImageWidth + outputImageWidth % 2
  outputImg = Image.new("RGBA", (outputImageWidth,outputImageWidth))
  outputImgData = []
  for pX, pY, pZ, legoColorIndex in pixelLocations:
    outputImgData.append((63, legoColorIndex, 0, 255))
    outputImgData.append((pX, pZ*3, pY, 255,))
    print (pX, pY*3, pZ)
  outputImg.putdata(outputImgData)
  outputStream = StringIO.StringIO()
  outputImg.save(outputStream, format="png")
  outputString = outputStream.getvalue()
  outputBase64 = base64.b64encode(outputString)
  print outputBase64
  return 'buildData='+urllib.quote(outputBase64,'')+'&structure=%7B%7D'

if __name__ == '__main__':
  main(sys.argv[1])

def readRaw(rawFilePath):
  pixelLocations=[]
  f = open(rawFilePath, 'rb')
  vs = f.read()
  vs = [ord(v) for v in vs]
  sizex = vs[8]
  sizey = vs[12]
  sizez = vs[16]
  vs = vs[24:]
  for z in range(sizez):
    for y in range(sizey):
      print ""
      for x in range(sizex):
        v = vs[1*(x + y * sizex + z * sizex * sizey)]
        if v != 0:
          legoColorIndex = 4
          pixelLocations.append((x,y,z,legoColorIndex))
          sys.stdout.write('X')
        else:
          sys.stdout.write(' ')
  f.close()
  return pixelLocations
With the resulting PNG encoded in base64 format, we can submit to the web service:
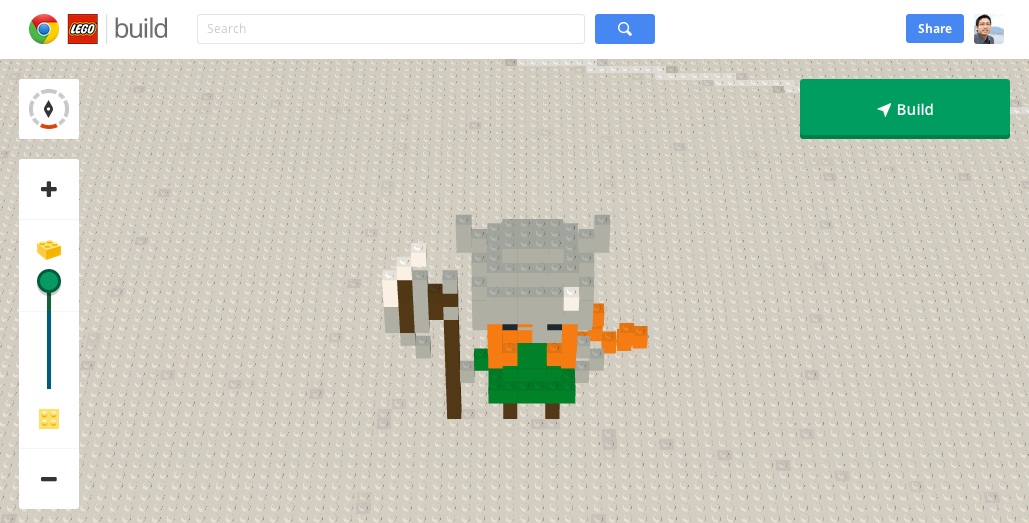
Voila! Hopefully this helps you in creating beautiful Lego models in Build with Chrome.